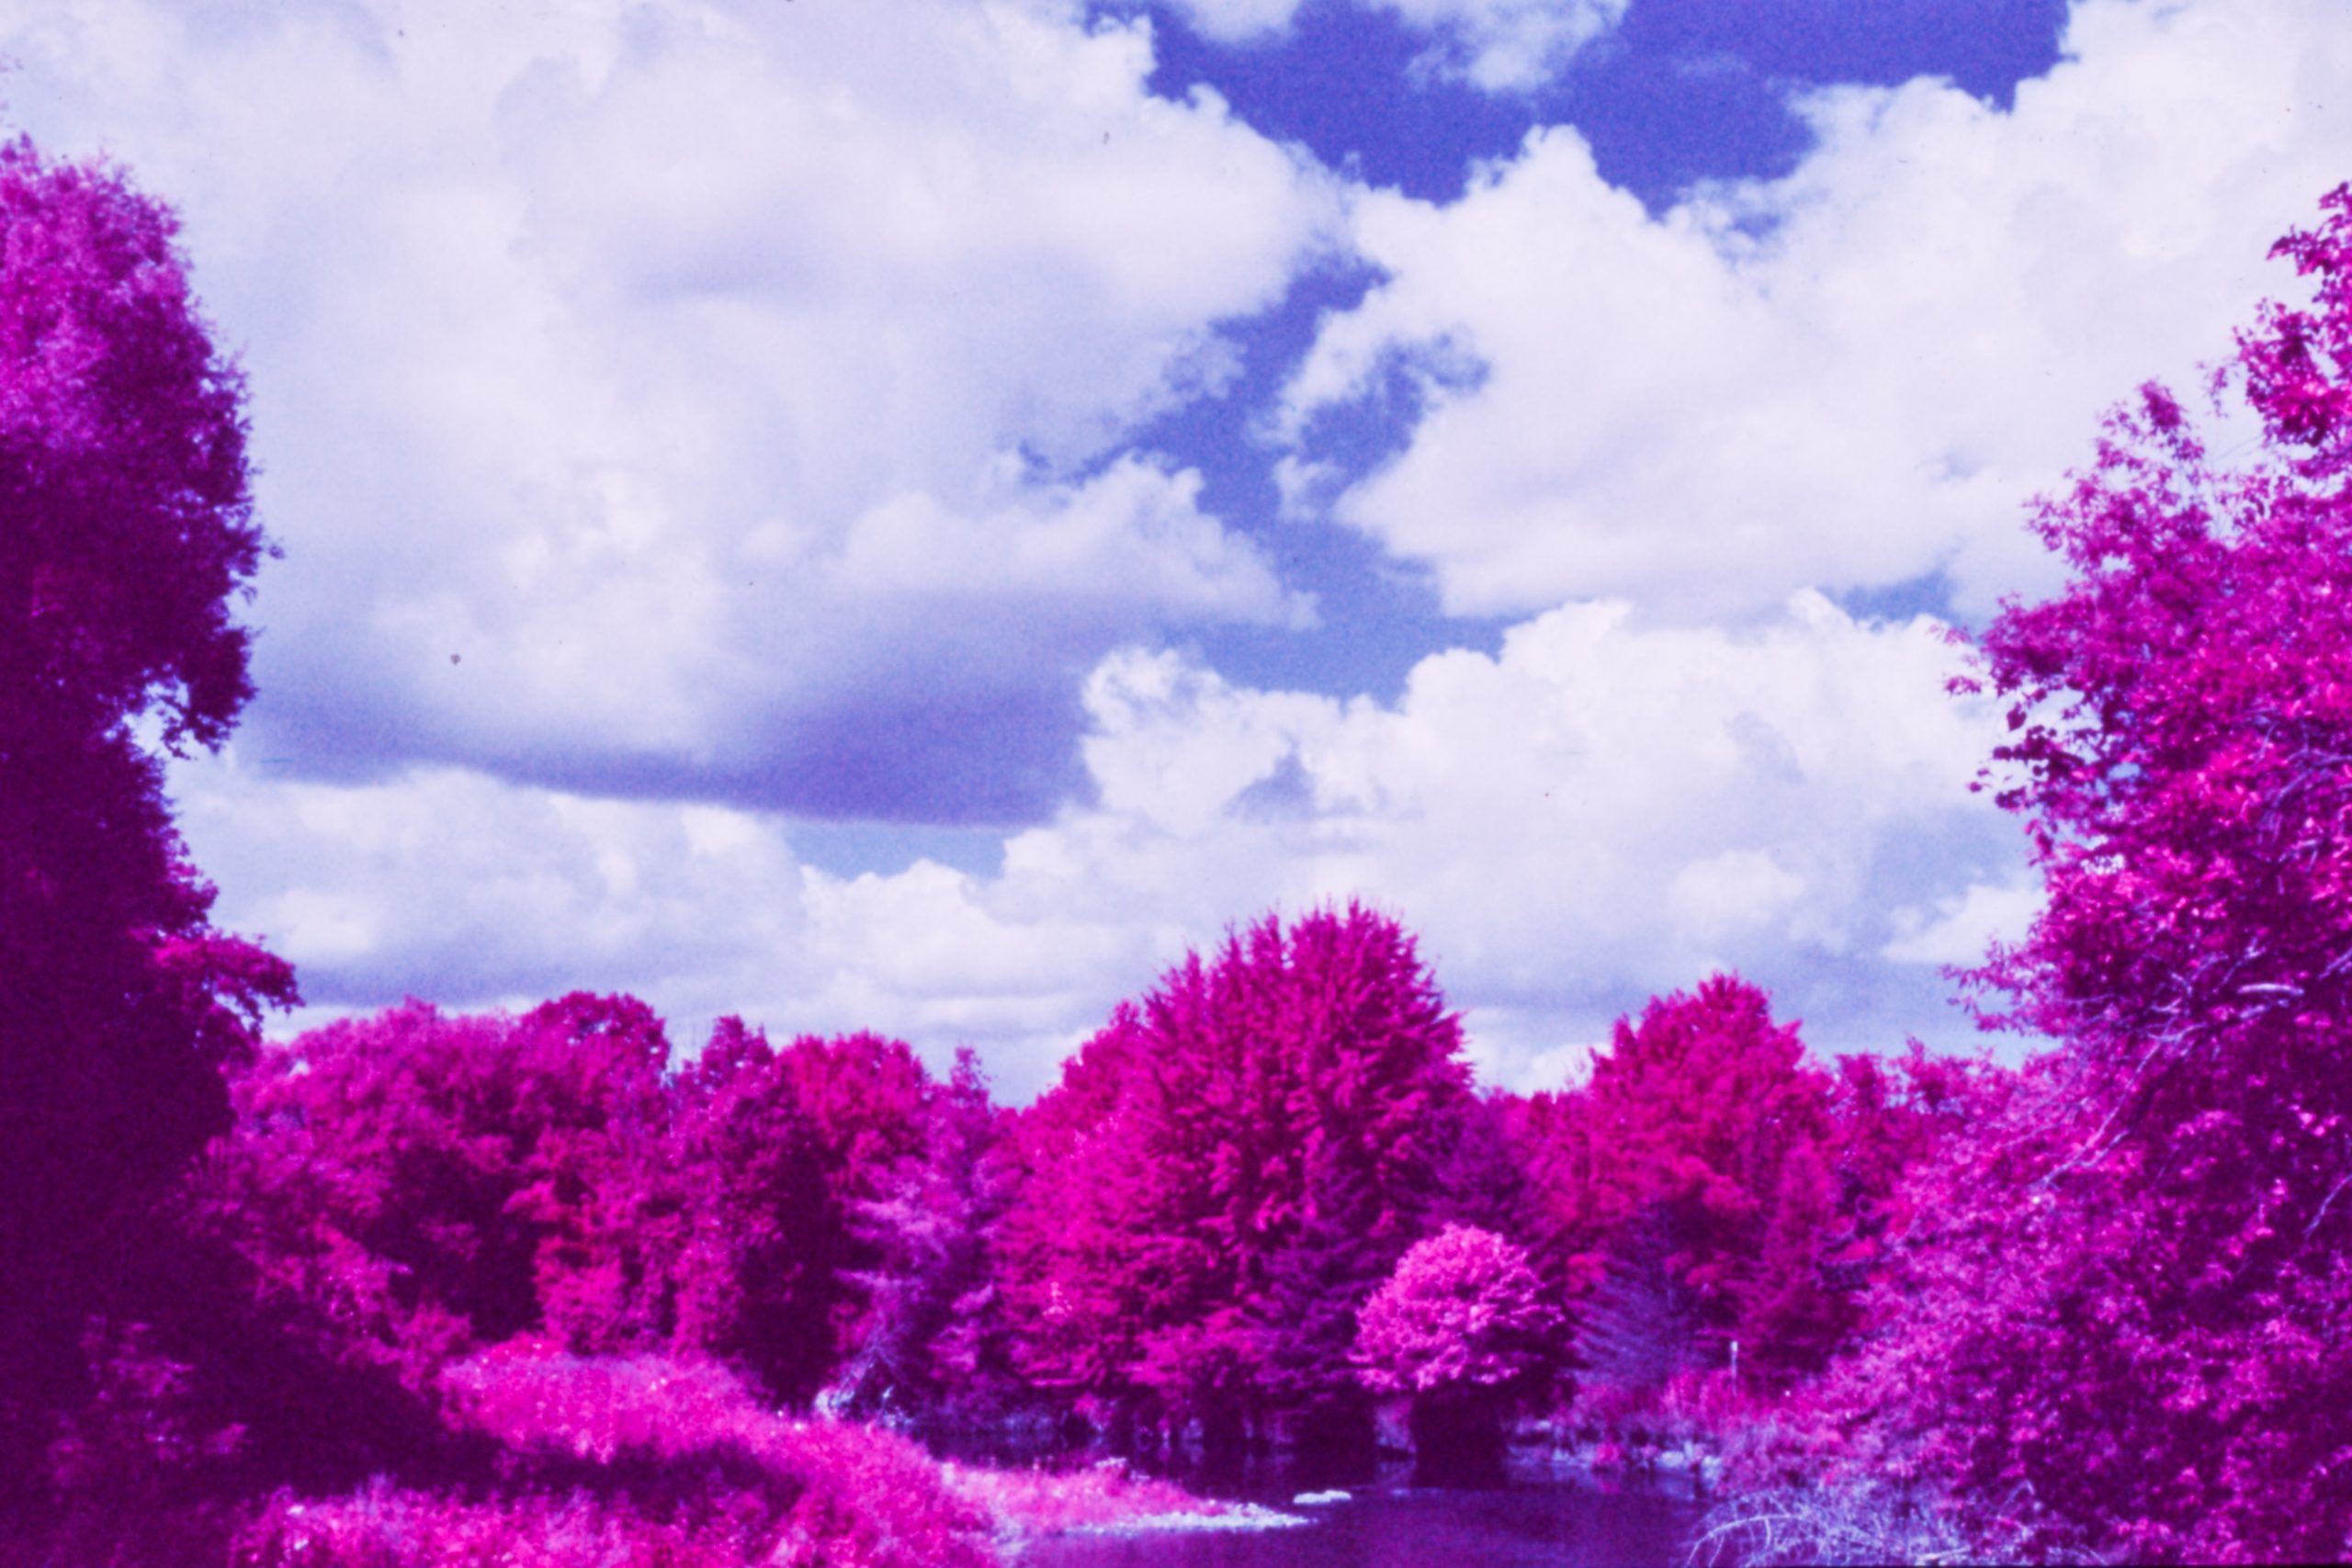
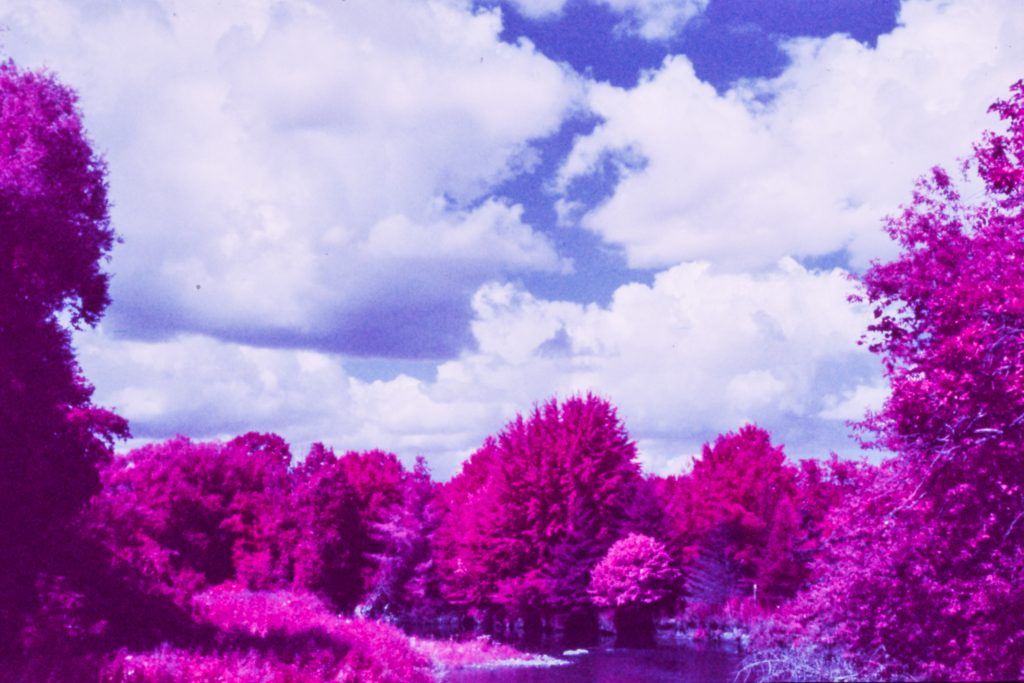
There are certain films that produce photographs that look different from reality, and then there is Kodak EIR.
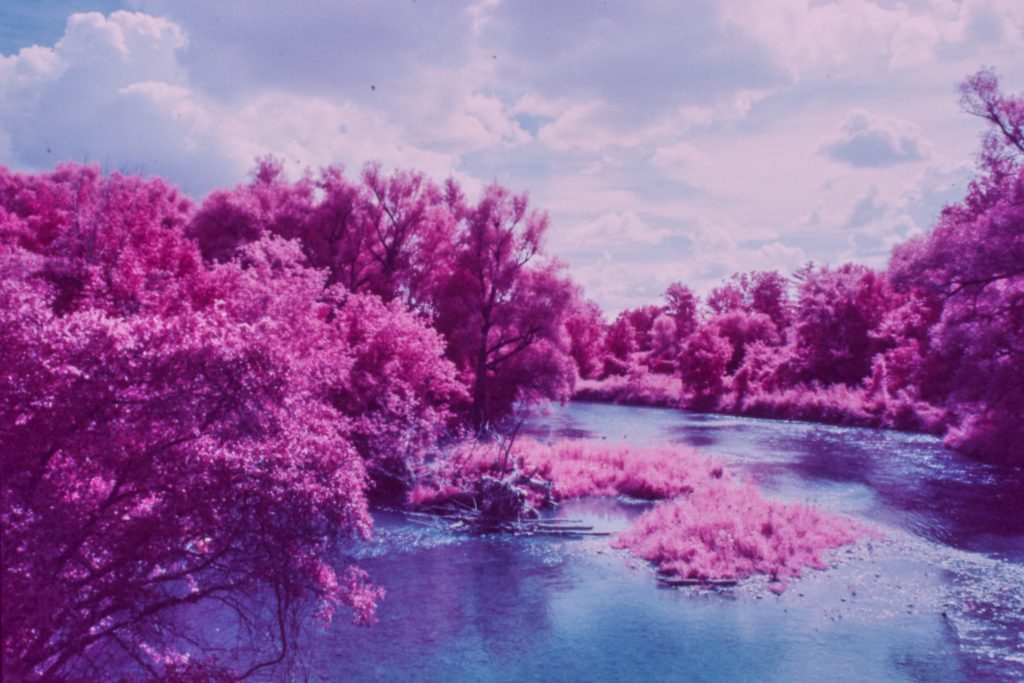
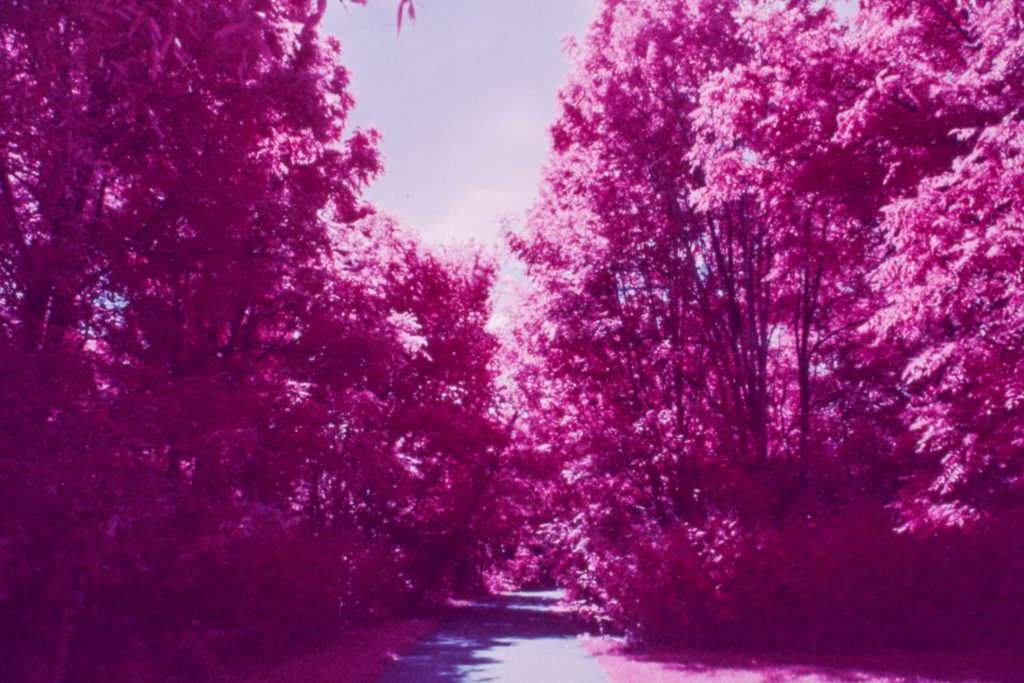
For anyone accustomed to conventional colour film, the first encounter with EIR can be almost disorienting. Green foliage can become brilliant magenta or crimson, blue skies can take on deep cyan or almost surreal blue tones, and an otherwise ordinary landscape can suddenly look as though it belongs on another planet.
That is precisely what makes Kodak EIR so fascinating.
For this project, I wanted to spend some time exploring what this remarkable film could do with a camera and workflow that I am very comfortable with. I shot Kodak EIR in my Nikon F6, using a Yellow #15 filter, and deliberately gave the film one stop more exposure than my initial meter reading suggested. The film was processed using a Rapid E-6 kit in a JOBO CPP2 processor, and the resulting transparencies were scanned on an Epson Expression 10000XL. Once scanned, I made only minor adjustments in Lightroom.
The result was a collection of photographs that demonstrate just how strange—and beautiful—false-colour infrared photography can be.
What Exactly Is Kodak EIR?
Kodak EIR, Ektachrome Infrared, or Aerochrome is one of those films that has acquired almost legendary status among film photographers.
Unlike conventional black-and-white infrared films, which record infrared radiation as variations in brightness, EIR produces a false-colour image. Infrared wavelengths are translated into colours that bear little resemblance to what our eyes see.
The effect is particularly dramatic with vegetation.
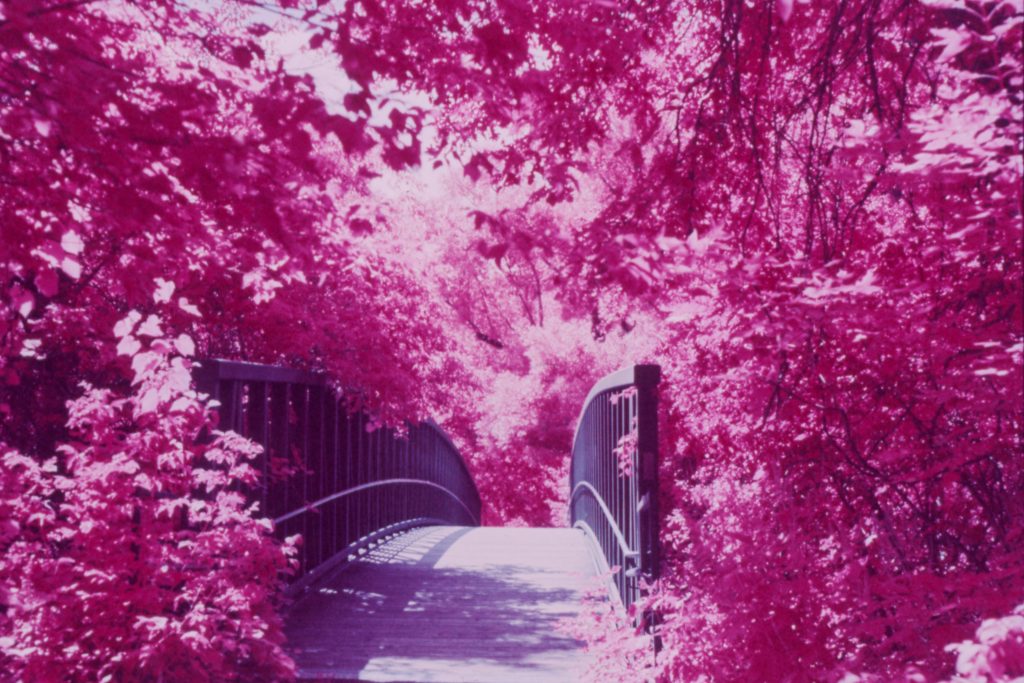
Living plants reflect a surprisingly large amount of near-infrared radiation because of the way their cellular structures interact with light. Kodak’s infrared films exploit this characteristic, turning vegetation into extraordinary shades of pink, magenta and red.
The technology behind the film has an interesting history. Kodak originally developed Aerochrome under a military contract during the Second World War. One of the objectives was camouflage detection. Military planners knew that natural vegetation reflects infrared radiation differently from painted surfaces and artificial camouflage. By rendering infrared radiation as a visible false colour, the film could make concealed objects stand out from their natural surroundings.
Kodak eventually brought the technology to photographers in the form of Ektachrome Infrared, or EIR.
The film later became associated with the psychedelic visual aesthetic of the 1960s and 1970s, when photographers and musicians discovered that its surreal colour rendering could produce images unlike anything possible with conventional colour film.
And that is really the appeal of EIR: it doesn’t simply record a scene differently. It reinterprets it.
Why a Filter Is Essential
One of the most important things to understand about Kodak EIR is that you cannot simply put the film in a camera and expect the classic infrared effect.
Filtration is critical.
The film is sensitive to visible blue wavelengths as well as infrared. Without appropriate filtration, the resulting colours can become muddy and purplish rather than producing the distinctive false-colour separation that photographers associate with EIR.
For this project, I used a Yellow #15 filter.
The Yellow #15 is an excellent choice for EIR because it substantially reduces the amount of blue light reaching the film while allowing the infrared component to dominate the exposure. The Yellow #15 is preferred over a conventional Yellow #12 because it cuts blue more aggressively and can produce cleaner separation and more dramatic crimson and pink tones.
This is an important distinction between shooting EIR and shooting conventional black-and-white infrared film.
With black-and-white infrared, photographers commonly reach for extremely deep red or opaque R72 infrared filters. With EIR, the goal is different. We aren’t simply trying to remove visible light—we are manipulating the balance between visible wavelengths and infrared so that the film produces its characteristic false colours.
And that makes the choice of filter part of the creative process.
My Nikon F6 and Kodak EIR
For this particular experiment, I used a Nikon F6.
The F6 might seem like an unusual choice for infrared film because it is a highly sophisticated electronic camera with advanced metering and automation. In fact, the metering system requires some consideration when shooting EIR.
The problem begins with the way modern camera meters work.
Silicon photodiodes (SPDs)—the technology used in many modern TTL meters—are naturally sensitive to near-infrared radiation. Camera manufacturers compensate for this by incorporating infrared-cut filtering into the metering system so that the meter responds more like the human eye.
This creates an interesting situation when shooting infrared film.
The film is interested in infrared radiation, but the camera’s meter is deliberately designed to ignore much of it.
Add a strong filter such as the Yellow #15 and the situation becomes even more complicated. The filter removes a substantial amount of visible light while the camera’s meter continues to largely ignore the infrared component. The result is typically an under-exposure of +0.5EV to +1EV.
The result is that you cannot simply assume that the F6’s sophisticated metering system is going to give you a perfect infrared exposure. To compensate for this when shooting EIR I recommend avoiding Matrix Metering and using Center-Weighted or Spot Metering instead. For the Yellow #15 configuration, it gives an ISO 160 baseline, or ISO 200 with approximately +0.5 EV compensation.
For my photographs, however, I chose to take a somewhat more generous approach and overexpose by one half stop.
One of the things I wanted to explore was how EIR responded when given more exposure than the nominal baseline. The results were very good, particularly when scanning the transparencies and looking at how the additional exposure affected the colour and density of the final images.
It is worth emphasizing, though, that EIR processed in E-6 is not particularly forgiving. Its exposure latitude as extremely narrow and its contrast as very high.
E-6 Versus C-41
Developing Kodak Ektachrome Professional Infrared (EIR) film in E-6 versus cross-processing it in C-41 results in different color renditions, and exposure latitudes. Officially EIR is a positive slide-transparency film originally designed for AR-5 or standard E-6 for later 2236 emulsions which were produced from 1997 to 2007. Cross-processing in C-41 has long been favored by photographers for its modern scanning flexibility and exposure latitude. However there are some trade-offs with C-41 Processing.
E-6 renders the iconic, aggressive “Aerochrome” look natively reflecting chlorophyll heavily providing the bright red/magenta that the film is known for. However, cross-processing in C-41 narrows the contrast and lowers the saturation slightly, but might be a good idea for high contrast scenes where you may want to guard against blown highlights under harsh midday sun.
That means my +0.5 to 1-stop approach shouldn’t necessarily be interpreted as a universal recommendation. Bracketing is always a recommendation if the images are crucial to your project.
With EIR, exposure is very much part of the experiment. For this particular project, I wanted the classic EIR transparency look, so E-6 was the obvious choice.
Why Midday Sun Works So Well
Infrared photography is often associated with bright sunlight, and EIR is no exception.
The strongest false-colour effects tend to occur when vegetation is receiving plenty of direct sunlight. Plants reflect significant amounts of near-infrared radiation, and that infrared reflection is what produces the dramatic colour transformation.
Spring foliage is capable of producing particularly intense neon colours because of active chlorophyll and moisture, while mature summer foliage can move toward deeper ruby, crimson and blood-red tones.
This seasonal variation is one of the things I find most fascinating about infrared photography.
A tree is not simply “green.”
To our eyes it is green because of the visible wavelengths it reflects. To EIR, however, the same tree becomes a completely different subject because the film is responding to another part of the electromagnetic spectrum.
That means the visual character of an EIR photograph depends not only on the composition, light and exposure, but also on the biological state of the vegetation.
The Strange Relationship Between Foliage and Colour
This is perhaps the most important creative concept when working with EIR.
You aren’t really photographing colour in the conventional sense.
You are photographing infrared reflectance and allowing the film to translate that information into colour.
Broadleaf vegetation can become intensely pink, magenta or crimson. Conifers behave somewhat differently because their needles have a different structure and tend to produce darker, less intensely coloured results.
This can create wonderful contrasts in a landscape.
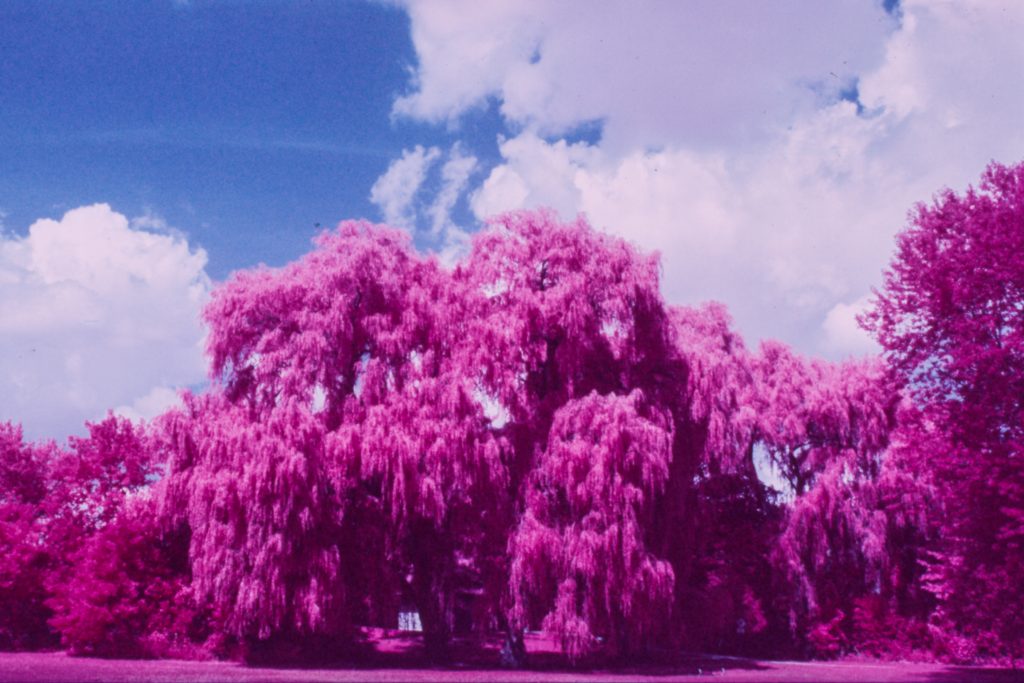
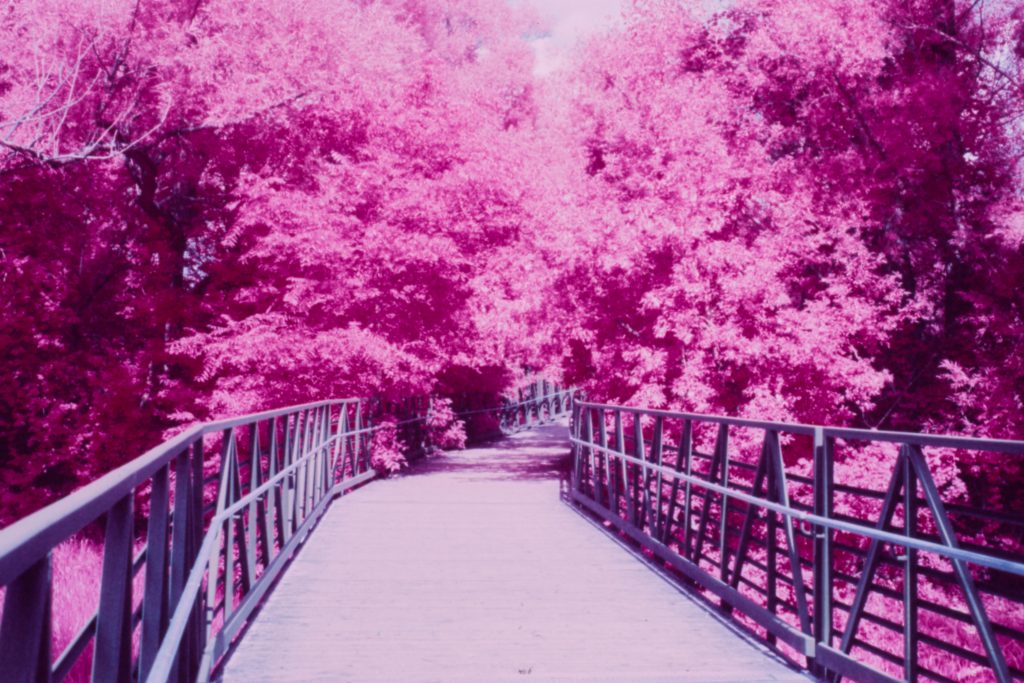
A scene containing deciduous trees, evergreens, blue sky, water and architecture can be transformed into a completely different colour palette.
It is also worth remembering that autumn foliage doesn’t necessarily produce the spectacular infrared colours one might expect. Once chlorophyll breaks down, a yellow or orange leaf may no longer reflect infrared in the same way as healthy green foliage. This means specifically that brightly coloured autumn leaves can become comparatively dull and muddy in EIR, while evergreen vegetation can continue to produce strong false-colour effects.
That is a fascinating reminder that EIR isn’t an “autumn colour film.”
EIR Is Not the Same as Black-and-White Infraredf
If you’ve used films such as Rollei IR or other extended-red/infrared-sensitive black-and-white films, EIR is going to feel very different.
Black-and-white infrared photography is primarily about tonal transformation.
Healthy vegetation becomes extremely bright because of the infrared radiation it reflects. This creates the famous “Wood Effect,” where foliage can become almost snow-white against dark skies and deep shadows.
EIR takes that concept and turns it into colour.
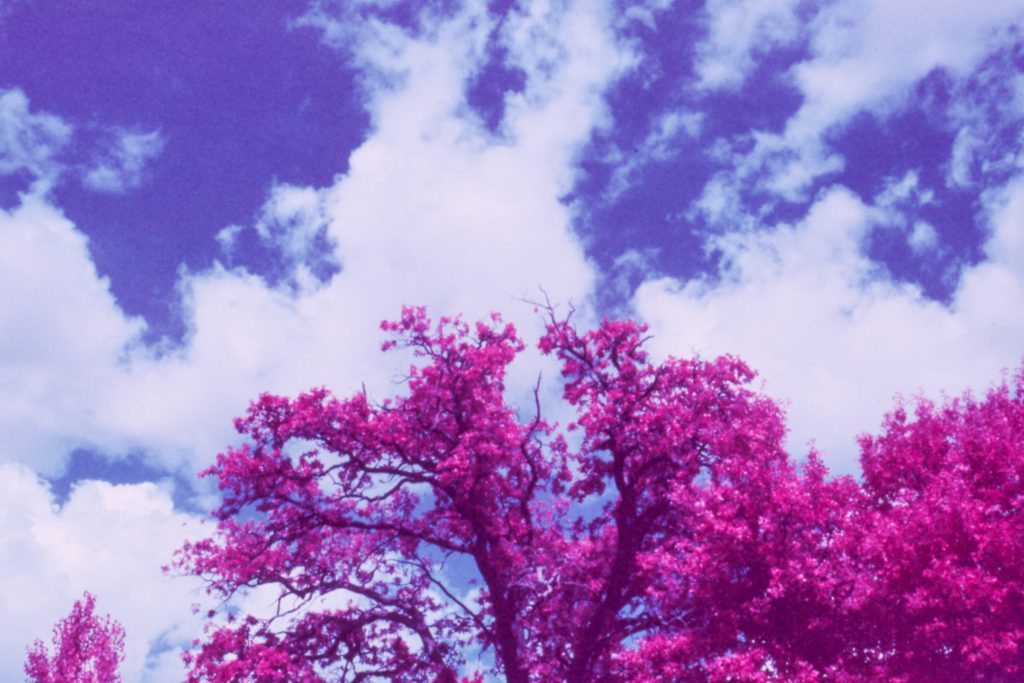
Instead of infrared foliage becoming white, it can become neon pink, magenta or crimson. Meanwhile, skies and water can move toward cyan, deep blue or even almost black depending upon the filtration and exposure.
The result is less about realism and more about interpretation.
And that is exactly why I find it so compelling.
Processing Kodak EIR in E-6
Originally, Kodak EIR and its aerial counterpart Aerochrome were designed for Kodak’s specialized AR-5 processing system.
That chemistry is no longer readily available to the average photographer, which means contemporary photographers have generally experimented with alternative processes.
For this project, I chose E-6 processing.
I processed the film using a Rapid E-6 kit in a JOBO CPP2 processor.
There is something particularly satisfying about processing a film like EIR yourself. With an unusual emulsion, I want as much control over the process as possible. A JOBO processor gives me very consistent agitation and, more importantly, very consistent temperature control.
That consistency is especially valuable with E-6.
EIR requires strict temperature control, specifying 38°C / 100.4°F for E-6 processing.
E-6 also produces a positive transparency, which means the result can be viewed directly on a light table or illuminated from behind.
There is something magical about seeing an EIR transparency for the first time.
The colours aren’t being interpreted by a negative scanner.
They are physically there on the film.
Scanning EIR
Once the film had been processed and dried, I scanned the transparencies using an Epson 10000XL.
Scanning EIR is not quite like scanning ordinary Ektachrome.
The colours are so far outside the normal colour space that automated scanning corrections can easily try to “fix” something that isn’t actually broken.
I recommend disabling automatic colour correction and manually controlling the basic colour parameters so that scanning software doesn’t attempt to neutralize the intense pinks and shift them toward what it considers a conventional colour balance.
This is one situation where I think it pays to treat the scanner as a recording device rather than an image-making device.
My goal was to capture what was actually on the transparency and then make only modest adjustments afterward.
I made minor edits in Lightroom, primarily to refine the final presentation rather than radically alter the colour produced by the film.
One Important Scanning Consideration
There is another technical issue that anyone scanning EIR should be aware of: infrared-based dust removal.
Many film scanners use an additional infrared channel to detect dust and scratches on the film. Unfortunately, EIR itself responds to infrared radiation. The result can be disastrous.
I cannot emphasize enough that Digital ICE or similar infrared cleaning systems should be disabled when scanning EIR because the scanner’s infrared cleaning channel can interpret the film’s infrared-reactive layers as dust or defects.
So if you’re scanning EIR, turn off the infrared dust-removal function.
It is a small detail, but it can make an enormous difference to the scan.
The Look of EIR
What I particularly enjoy about the photographs from this roll is that they occupy a strange middle ground.
They are recognizable landscapes and objects, but they don’t look like photographs of those things anymore.
Trees become explosions of colour.
Green grass can become something resembling a fluorescent carpet.
Blue skies become intense and unnatural.
Water can become dark and dramatic.
And ordinary scenes suddenly acquire a dreamlike, almost psychedelic quality.
This is one of the reasons I think EIR is better suited to deliberate photography than casual snapshot photography.
It demands that you think differently about your subject.
Instead of asking, “What colour is that tree?” you begin asking, “How much infrared is that tree reflecting?”
Instead of asking whether the sky is blue, you start considering what that blue sky will become once the film and filter have translated the scene into another colour space.
That is a very different way of seeing.
Some Practical Advice for Shooting EIR
If you’re fortunate enough to get your hands on some Kodak EIR, there are a few things I would keep in mind.
Use a suitable filter.
For the classic false-colour effect, a Yellow #15 is an excellent starting point. Other filters can produce substantially different results. Orange filters can push foliage toward darker ruby and red tones, while stronger red filtration can produce an almost monochromatic red landscape.
Pay attention to the light.
Bright sunlight is your friend. The stronger the infrared reflection from the vegetation, the more dramatic the effect is likely to be.
Be careful with exposure.
EIR processed in E-6 has very limited exposure latitude and can produce extremely high contrast. My decision to shoot at +1 stop was an experiment rather than a recommendation that everyone should follow.
Consider center-weighted or spot metering.
I recommend avoiding Matrix Metering with the F6 and using Center-Weighted or Spot Metering instead.
Use a lens hood.
Strong infrared photography in bright sunlight can also be susceptible to flare and internal reflections. A lens hood is particularly useful when working toward the sun or with light striking the front element at an angle.
Load and unload the film carefully.
EIR’s clear base and lack of conventional anti-halation backing make it particularly vulnerable to light piping. Load and unload the film in complete darkness.
And finally:
Bracket if the subject is important.
Slide film has little tolerance for exposure errors, and EIR is no exception. If you’re standing in front of a once-in-a-lifetime landscape, giving yourself several exposure variations is cheap insurance.
Was It Worth Shooting?
Absolutely.
There is something wonderfully unpredictable about Kodak EIR.
With conventional colour film, I generally have a good idea of what a scene is going to look like before I press the shutter. With EIR, I have to surrender some of that control.
I know that the foliage will probably change dramatically. I know the sky will take on an unfamiliar colour. I know that contrast will be strong.
But I don’t know exactly what the final transparency will look like.
And that uncertainty is part of the attraction.
The combination of the Nikon F6, Yellow #15 filter, +1-stop exposure, E-6 processing in the JOBO CPP2, and Epson 10000XL scanning gave me a fascinating look at what this film can do.
The resulting photographs aren’t realistic representations of the scenes I photographed—and that is exactly the point.
Photography is often about recording what is in front of the camera.
Infrared photography gives us the opportunity to record something that our eyes cannot see.
Kodak EIR takes that one step further.
It doesn’t simply reveal the invisible.
It reimagines it.
And in an age where digital cameras can reproduce almost any conventional colour palette with extraordinary precision, there is something wonderfully satisfying about putting a piece of unusual film into an old-fashioned mechanical process and discovering that chemistry, light and infrared radiation can still produce something genuinely unexpected.
That’s the magic of Kodak EIR.
The world may look green to our eyes—but EIR reminds us that there is another world hiding just beyond our vision.